How to Polish Your Travertine Floor Tiles
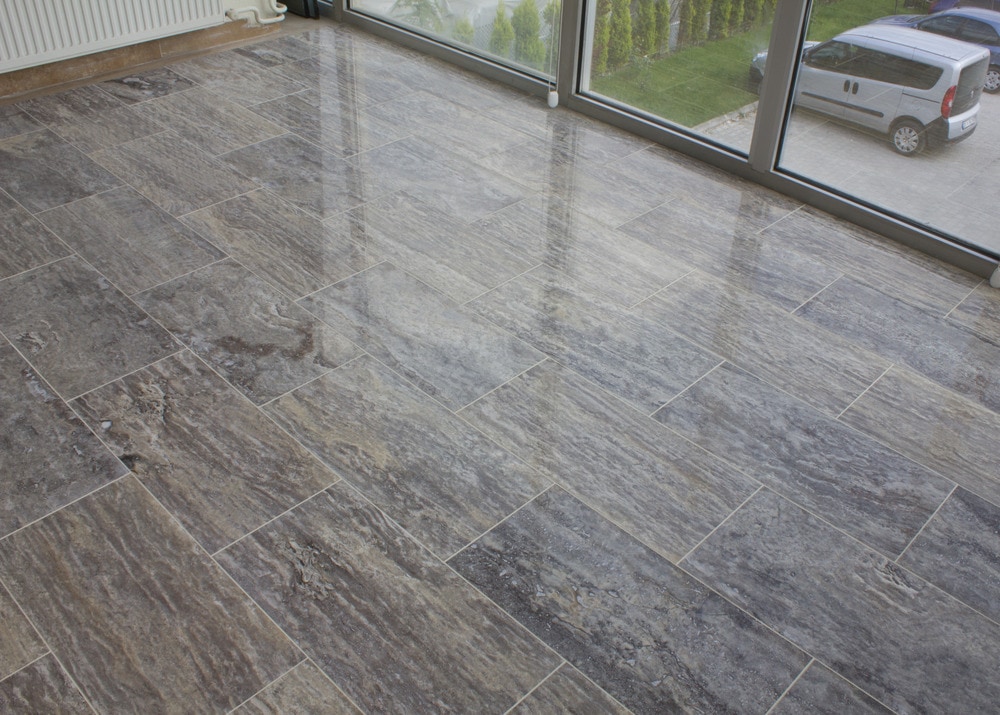
Travertine tile is a popular choice for both indoor and outdoor flooring because of the wide variety of color options and variations you can achieve with this durable material. This ultra-strong flooring has a tendency to look dull over time. You don’t need to call in the professionals to restore dull travertine floors to a like-new luster. All you need is a free weekend and a couple of supplies to polish the travertine floors yourself. It is the build-up of wax and dirt on travertine tile that makes it lose its original sheen. Fortunately, cleaning and polishing your travertine tile is a simple process that can be done as a weekend project.
Supplies:
- Shop vacuum
- Waterproof tape
- Protective plastic sheeting
- Floor stripper
- Travertine filler compound
- Mop and bucket
- Steam cleaner
- Weighted Buffing Machine
- Polishing powder
- Buffing pads
- Sealer
Step 1: Strip Excessive Material
Before you can polish a travertine floor, you have to start by deep-cleaning the built-up wax and dirt. Purchase a travertine stripper designed to remove a waxy build-up from the surface of the tile. A fresh mop is an ideal tool for applying the stripper to the floor. After covering the floor in an even coating of the stripper, repeat the mopping process with plain water a number of times, until you are certain the grime and wax are removed.
Step 2: Steam Clean the Travertine
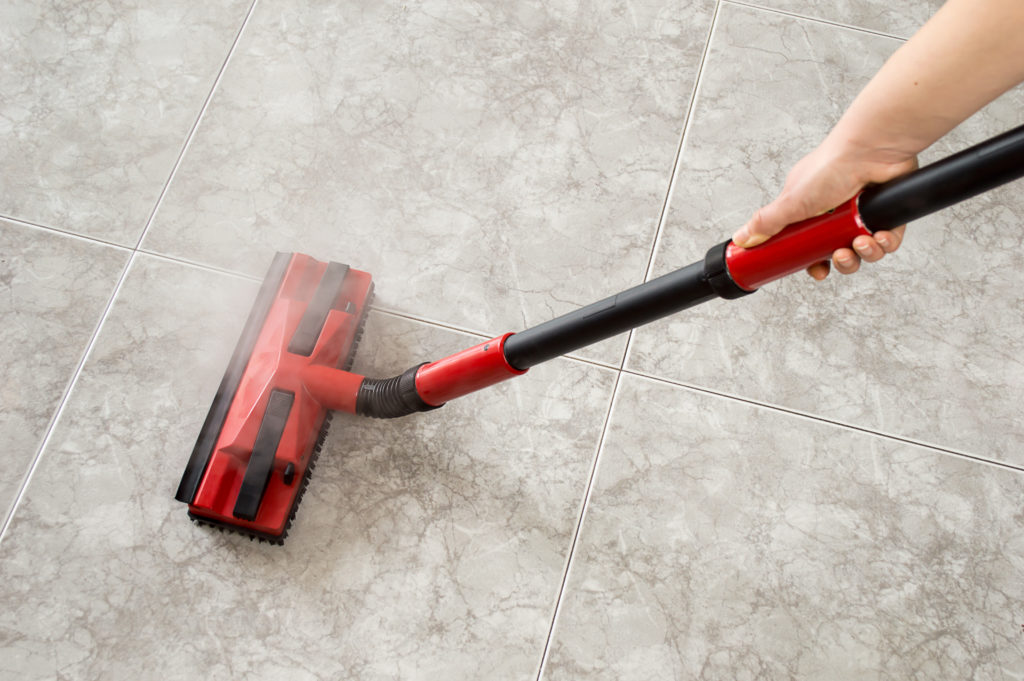
Using a steam cleaner gives the floor a deep-down clean and helps to break up any residual stripper and grime.
Use a steam cleaner to give the floor a deep-down clean. This step helps to break up any residual stripper and grime remaining on the floor and can even help to remove some light scratches and stains from the surface. The steam cleaner will also help to clean the grout between the tiles. Getting a high polish is only possible when you start with a nice, clean floor and steam cleaning is an essential second step in this process.
Step 3: Fill Cracks, Chips, and Holes
Once the floor is steam cleaned, it is time to make any repairs needed to restore the travertine floor to a like-new look. Filler compounds, such as epoxy, make it easy to patch cracks, chips, and other glaring imperfections in the tile. If epoxy is not available, a grout of the same color as the travertine makes a suitable substitute. Follow the material instructions, allowing the appropriate time for curing before the next step.
Tip: No matter which material you use, make sure to find a color that will match the existing color variations in the floor.
Step 4: Tape Plastic Sheeting Around Edges
Keep furniture, baseboards, cabinets, and other surfaces around your floors protected during the polishing process by taping them off and protecting them with plastic sheeting. Use waterproof tape around the perimeter of your floor and plastic sheets to prep the floor for the polishing step. If possible to move furniture, get it out of the way to prevent damage from the buffing machine or polishing solution.
Tip: If you are polishing multiple rooms, consider tackling one at a time, moving the furniture to the room that is not currently being polished.
Step 5: Polish the Travertine
Polishing the travertine tile requires renting a weighted buffing machine. There are two primary methods for completing the polishing process. The first method is using various grit pads to bring the surface of the travertine to a shine gradually. For the first pass, attach a low-grit diamond pad to the bottom of the buffing machine. The pad will help to remove scratches, and remaining stains and other surface etches or imperfections from the top layer of the travertine tile. This step also makes the compounds used to fill holes and cracks level and consistent with the rest of the flooring. After the first run is completed, continue the process with higher-grit pads with a polishing range from 800 to 8500 until you have a smooth finish with just the right amount of shine.
The second polishing method uses a polishing powder as opposed to multiple sanding pads. The instructions on the polishing powder will indicate what type of pad is needed for the weighted buffing machine. Sprinkle the polishing powder on the floor and work it into the tile using the buffer. This step can be repeated if necessary for additional polishing.
Tip: You get to decide how much shine you want the floor to have. The higher the grit or more times you use the polishing powder, the more shine you will achieve with your floors.
Step 6: Tidy Up & Seal
Polishing travertine is a messy process. Once you have restored the travertine to its original luster, the clean-up process begins. Mop the entire floor with clean water to eliminate any dust that is sprinkling the floor after the buffing process. After the floor is both clean and dry, apply a sealer of your choice to protect the surface of the travertine and keep the floor looking polished for a long time to come. Apply the sealer using the manufacturer’s instructions and allow to dry completely.
With your polishing project completed, all that’s left to do is remove the tape and protective plastic from the cabinets and baseboards. Arrange your furniture again and enjoy the look of your floors once again.
Travertine tile is a popular choice for both indoor and outdoor applications, especially in well-used spaces such as the kitchen and the bathroom. A well-polished floor calls attention to the intricate color variations in the surface, making the floors a focal point of the room design. While labor-intensive, the process of polishing travertine floors is not particularly difficult. Instead of replacing worn-looking floors, restore them to their original luster by completing this six-step process.