What Are Floating Floors?

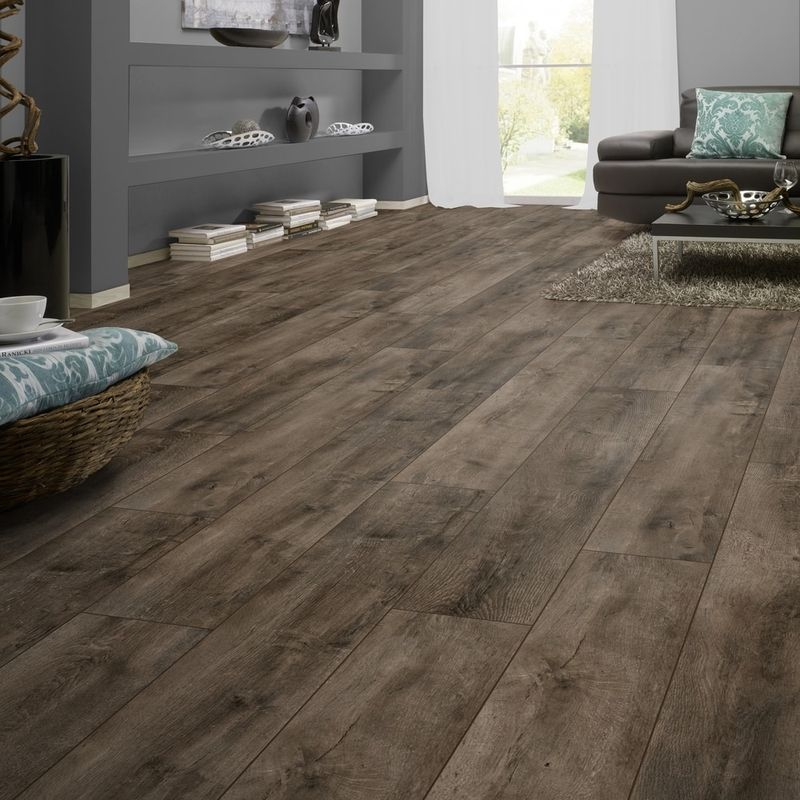
If you’re looking for new flooring that’s easy to install, floating floors are an excellent solution. This type of flooring gets its name from the way that it’s installed, which requires no nails or adhesives. Instead, floating floors simply lock in place and can usually be installed directly over most types of existing flooring. The Defiant collection from Lamton is a leading floating floor option that can withstand all types of abuse. This flooring is available at the price of $1.99 per square foot with free shipping from BuildDirect until March 1, 2021. It comes in six stunning colors and is embossed with 3D patterns to create an authentic hardwood look. These floating floors are water-resistant and have a high abrasion rating that can handle heavy foot traffic for amazing longevity. If you’re interested in finding out more about floating floors, read on to learn about them and how they’re installed.
Waterproof Floating FloorsFrom spilled coffee to wet bathrooms, waterproof engineered flooring gives you the beauty of hardwood without the stress. This type of flooring is easy to clean and won’t become warped or buckled after exposure to moisture. Consider installing waterproof engineered hardwood flooring in your home if you have children or pets to protect your investment. You’ll find a range of wood flooring waterproof options at BuildDirect, including Lamton Laminate which provides the look of wood without the fuss. From the bathrooms to your gourmet open kitchen, choosing waterproof engineered wood flooring is a smart choice that adds beauty to your home for years to come.
Floating laminate flooring installation
If you’re considering installing floating laminate flooring in your home, the process is easy with the right preparation and tools. Here are some step-by-step instructions to guide you through the process.

SKU: 15052090
Step 1: Determine How Much Flooring to Buy
Before you can install any type of flooring, you’ll need to figure out how much you should buy. Measure the length and width of the room, then multiply those numbers and add 10-percent to the total as a cushion for any excess waste. Another thing to consider is the size of the planks, so make sure that you purchase enough flooring to cover each room completely with a little bit leftover in case you make a mistake. Installation methods vary by different manufacturers, but a floating floor generally has the same installation process regardless of the brand.
Step 2: Prepare the Room
It’s crucial to prep the room before you install your new floating floors. Remove all moldings, floor trim, and baseboard, and put everything aside. You can also purchase new trim if you want to elevate the space and add a nice look to go with your new floors. Depending on the height of the new flooring, you may need to cut door jambs and casings to ensure a proper fit. Simply set a piece of scrap flooring on top of the underlayment and draw a line next to the casing or jamb, tracing it with a pencil. This will mark the height you need to cut so that your new floors will fit snugly underneath. Finally, vacuum your floors and remove all debris before you begin the installation.
Step 3: Install the Underlayment
Underlayment is thin padding made of foam that helps correct imperfections in the subfloor and keeps your laminate flooring snugly in place. Start in one corner of the room and unroll the underlayment in the same direction as your new floors. Do not overlap the underlayment. Make sure that each of the edges is directly next to each other. You can cut the underlayment with a utility knife so it fits around obstacles and corners.
Step 4: Tape the Underlayment Seams
Use polyethylene tape to secure the seams of the underlayment in place. This creates a moisture barrier and is particularly vital if you’re installing floating floors over concrete, such as in a basement.
Step 5: Check the Materials
Now is the time to ensure that your new flooring is in good condition before installation. Open a few boxes and look for any signs of damage like splinters, chipping, or evidence of dust lodged in the tongue or grooves. Anything that looks out of place can prevent your new floor planks from locking together and forming a smooth, tight seam. If everything looks OK, it’s time to begin installing the floors.
Step 6: Planning and Cutting
The first row of flooring should be lined against the most visible wall and laid parallel to the longest wall in each room. Leave around a ¼-inch space between the flooring edge and walls as well as near the base of any cabinets. This helps the floors expand and contract as humidity levels change. You may also use a ¼-inch spacer as a guide. Any cuts to this type of flooring should be minimal except when you need to cut off an end piece on a row. Laminate is easy to cut, and all you need is a square to mark the line and a saber saw to make the cuts.
Step 7: Install Floor Planks
You want your floor planks to have a close-fitting seam, so place the last plank against the wall and use a pry bar to force it gently against the one beside it. The goal is to ensure that the tongue fits tightly into the groove. Mix and match your planks as you go, using material from different boxes. This will ensure a natural, organic look and provide more variations in color and tone.
Step 8: Install Rows of Wood
When installing rows, work from right to left and place the planks with the tongue side facing the wall. Angle the next board so that the tongue and groove snap together. Continue this process until you’ve completed one row, making sure to maintain a ¼-inch space between the flooring and the wall. You may need to cut the last plank of the row, but you can use any leftover material to start your next row to create a clean, staggered look. Use a hammering block and gently tap each piece into place until they form a tight seam.
Step 9: Cut A Cardboard Template
You may run into some tricky spots around door jambs or cabinets. Use a piece of stiff cardboard and trace the outline to create a template. Use this cardboard as your guide to make your cuts or to wedge the plank into place. You might be able to lightly shave a bit of the floor plank off from the bottom so it can be placed directly under the door jamb.
Step 10: Cut Plank Lengthwise
When you reach the last row of flooring, you may need to cut it lengthwise with a jigsaw in order to make it fit. Use the saw to rip the plank lengthwise so that it fits perfectly against the wall and is the correct width for a secure fit.
Cut the Tongue off of the Plank
If you need to cut the tongue off of a plank, use a sharp chisel or utility knife to remove it from the plank you are installing against.
Clamp Wood in Place
To attach the flat ends of planks together, clamp them into place and use white wood glue. Keep them clamped together for about 30 minutes or until the glue is fully set.
Install the Last Row
The last row of your flooring may be a bit more difficult to install. Remove the spacers to give you extra room and use a pry bar to gently pull the last piece tightly against the one before it. You may need to slide it into place using a block and hammer. If you’re gluing planks together, wait until it’s completely cured before you remove any spacers and painter’s tape and before you trim out the room with the molding around the perimeter of the room.
Step 11: Bad Laminate Installation
There are some signs to look for that may indicate a bad laminate installation. This usually occurs when the floor is installed too close to the walls, causing the planks to rise and hump across the middle. Another cause is when long screws or nails are installed through the floating floor, which can cause each piece to become uneven and buckle.
One Way to Repair Laminate Floors
If you have an issue with your laminate floors, start by removing the baseboard on each side of the room to ensure that the planks are tight against the wall. You may need to remove the last row of flooring to make repairs. If so, be careful not to damage the planks unless you have some extra materials left over. Use a pull bar to get under the edge of the plank, then use a hammer to gently tap it, pulling the bar sideways until it comes loose. If there’s evidence of nails or screws, you may need to completely remove these planks and reinstall new ones for a tight, smooth fit.

Papua Ebony SKU: 10079693
Floating floor FAQs
Do you put a floating floor under appliances?
You can install floating floors under appliances, but make sure there is enough space between each plank so that it can adjust due to the variations of humidity and moisture in your kitchen. It’s best to install the flooring first, then place the appliances on top of it.
How does a floating floor stay in place?
Floating floors use a tongue and groove design that allows them to attach together. With the right amount of spacing around the perimeter of the room, they can easily expand and contract with humidity fluctuations while staying in place.
How do you install floating laminate flooring?
Measure your room, gather your materials, and install each section row by row, making sure that they’re snugly attached together. Underlayment is recommended on concrete floors. Only minor cuts are needed when you reach the last row so that the planks fit securely.
Is a floating floor easy to install?
A floating floor is easy to install and does not require messy adhesives, screws, or nails. Most homeowners can install this type of flooring DIY with the right installation information and few simple tools.
Do you need underlayment for laminate flooring?
Underlayment is a layer of foam that provides a protective moisture barrier for your laminate flooring. It’s especially recommended when installing this type of flooring over concrete or in wet spaces like kitchens and bathrooms.
How much does it cost to have a floating floor installed?
Floating floors cost an average of between $2 and $8 per square foot. If you’re hiring a professional to install your floors, the national average is approximately $2,300 for a 300-square foot room.
How long does it take to install a floating floor?
The length of time it takes to install a floating floor depends on the size of the room and how much preparation is needed. Aside from prep time, it can take between 3-4 hours to install the flooring and an additional 2-3 hours to make cuts and install it around door jambs and cabinets.
What is the advantage of a floating floor?
Floating floors come in a variety of styles including vinyl, laminate, and engineered hardwoods. This flooring is beautiful, extremely durable, and very easy to install, making it a favorite among DIYers.
Why is my floating floor buckling?
Your floating floor may be buckling due to improper installation. If nails or screws were inserted into the floors, it can cause them to buckle. Another reason may be that there was not enough space around the edge of the room to allow the material to expand and contract.

