How to Remove Ceramic Floor Tiles
When it’s time to replace a ceramic tile floor, the first order of business is to remove the old tile. This can be a piece of cake, or it can quickly become a headache, depending on a few factors over which you have no control. Either way, this helpful tutorial offers tips and tricks to make the job as quick and easy as possible.
Tools You’ll Need to Remove Ceramic Floor Tiles
You’ll need at least some of these helpful tools to make the job of pulling up ceramic floor tiles easier:
- Floor scraper, which features a broom-type handle with an angled steel head attached for removing flooring
- Reciprocating saw (or, less ideally, a circular saw)
- Cold chisel
- Hammer
- Pry bar
- Paint scraper
- Sheet or drop cloth
- Painter’s tape
- Plastic or a filter for the vents
During the task of removing tiles, sharp debris will be flying, so a sturdy pair of safety glasses and a pair of thick gloves are absolutely essential. Depending on how messy the job gets, you may also want to wear a dust mask.
Step One: Prep
Carefully remove the baseboards in the room, taking care to label them on the back so you know where they go when it’s time to replace them. If possible, remove any built-in furniture, including the tub and toilet, that lies on top of the tile. Use painter’s tape to secure plastic or a breathable filter over the vents to keep dust out of the HVAC system.
Step Two: Break Up the Tiles
You have two choices when it comes to breaking up tiles for removal. The first is to break just one or two tiles so that you can slide your chisel or pry bar under the remaining tiles and pop them out. The second option is to smash all of the tiles and use the floor scraper to remove what’s left. Which method is easiest depends on your floor.
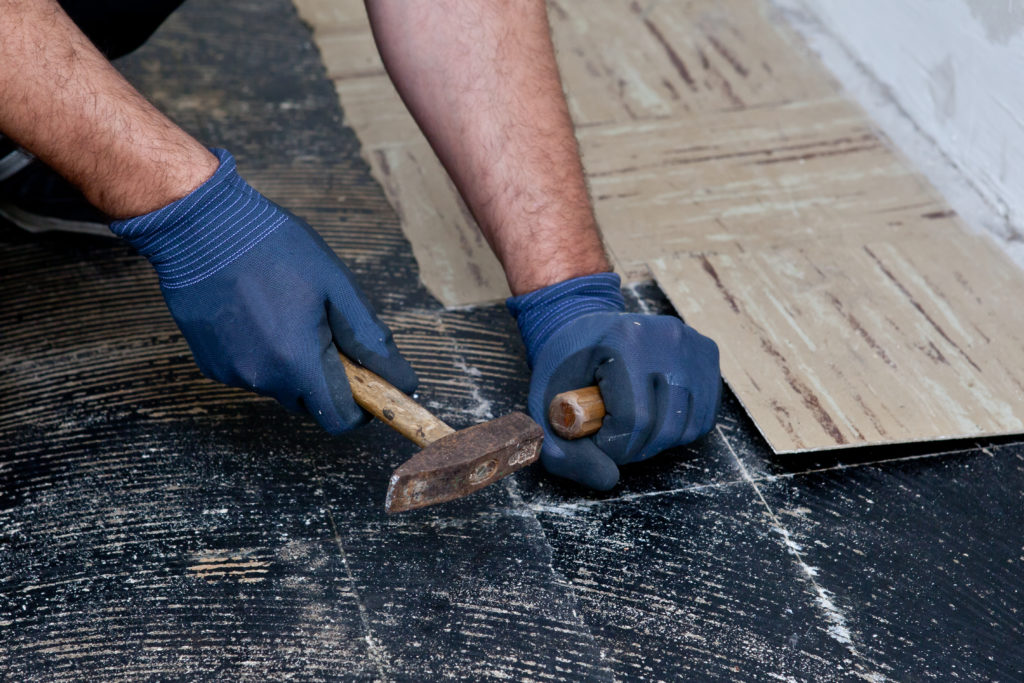
The first order of business is to put on your safety glasses and lay the drop cloth on top of the tiles you’ll be breaking. To break a tile, hit it firmly in the center. Remove the loose pieces of tile, and use the hammer to wedge the chisel under surrounding tiles to pry them up. If they don’t come up easily, break and clean out an area of tile large enough to accommodate the floor scraper, and use it to force the tiles up.
If the tiles are still stubborn, break them all and use the chisel and floor scraper to clean up the debris.
Step Three: Prep or Remove the Underlayment
The underlayment is the surface upon which a tile floor is laid. It’s generally attached to the plywood subfloor with nails or screws. Depending on the condition of the underlayment and how easily the adhesive or mortar comes up, you may choose to remove debris and re-use the underlayment, or you may opt to remove the tiled underlayment and install a new one.
The type of underlayment you’ll find under your tile depends largely on the age of your home. Older homes will likely have a plywood underlayment with a mortar bed on top of it, while newer builds will likely have a cement board underlayment and tiles attached with adhesive.
Prep the Underlayment
If you’re going to re-use the underlayment, you’ll need to remove any remaining adhesive or mortar. To remove adhesive, first try scraping it up with the floor scraper. If it’s stubborn, use a heat gun to soften it, and remove it with a wide putty knife. To remove a mortar bed, break it up with the hammer and use the floor scraper to clear it away. Make sure the underlayment is in good shape once it’s cleared of debris. If it’s not, you’ll need to replace it before laying a new floor.
Remove the Underlayment
If you find that removing the adhesive or mortar is going to be extremely labor- or time-intensive, it will be faster and easier to simply replace the underlayment. Nowadays, contractors and DIYers are opting for membrane underlayment, which is a thin, flexible sheet of plastic or polyethylene that can easily be cut with a utility knife and laid in even tight spaces.
If you’re planning to replace the underlayment either way, the easiest solution may be to remove the underlayment in sections with the tiles attached. To do this, divide the floor into sections. Start by removing a row of tiles down the length of the floor and another row down the width of the floor. Use a reciprocating saw to make a long, shallow cut into the exposed plywood along the length and width. Take care not to cut through the subfloor.
Wedge your pry bar between the subfloor and the underlayment, and pry up the underlayment, tile and all. If you need more manageable sections, remove more tiles and make more cuts.
How to Remove Ceramic Tile from a Concrete Floor
It’s not uncommon to find tiles laid directly on a concrete floor. In some cases, you can install an underlayment directly over the old tile and lay a new tile floor on top of it. In other cases, the tile will have to go. In that event, since there is no subfloor, you’ll need to do what it takes to get the tiles and mortar or adhesive off the concrete.
Break a tile, and wedge the chisel under adjacent tiles to break them loose from the concrete. Use the hammer, chisel, pry bar, and floor scraper to break, loosen, and remove the tiles and mortar or adhesive.
If the tiles refuse to budge, rent a small jackhammer with a chisel point to pry up the tiles. If you’re removing tile from a large room, an electric tile stripper will do the trick more efficiently.
Removing tiles is a moderately difficult job, although if everything goes just right, it can be surprisingly easy. But since things rarely go just right, having helpful tools on hand and the information you need to make the right decisions will help ensure your latest DIY project runs smoothly.


