Should You Tile Over Vinyl Flooring?
|
|
Time to read 4 min
 Skip to content
|
|
Time to read 4 min
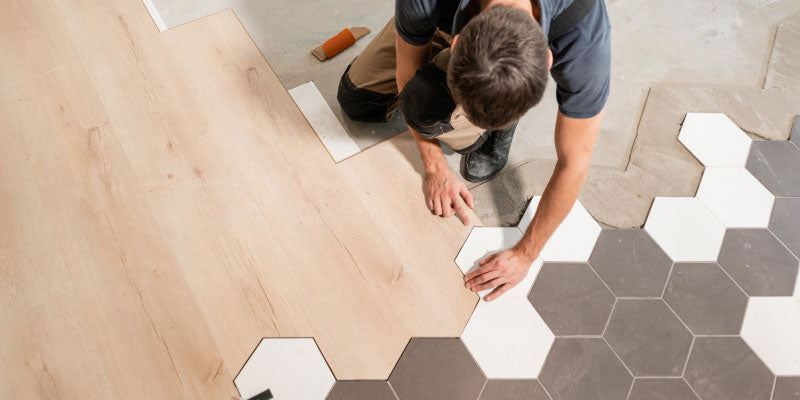
Installing a new floor can be a big do-it-yourself task. Even if you’re DIY-minded, updating your kitchen, family room or a bathroom can be a large project to embark on. Even a small powder room, entry area or mudroom can be a lot of work if you’re going to be tackling it alone or with the help of friends and family members.
One possible way to make this job faster and easier is to tile over vinyl or linoleum without removing your existing flooring first. While this can be done, you’ll have to evaluate your floors to see if it’s a possibility for you and your home.
Keep reading to learn more and find out if you should tile over vinyl in your home.
Installing tile on top of existing vinyl flooring can be a big time saver. To do this effectively though, your floors have to be in good shape. Here are a few things to look for when evaluating your vinyl to see if it can be left in place:
This is common around the walls and edges of a vinyl floor, particularly as the material gets older. Buckled or curled vinyl does not make a solid, stable surface for a new tile floor.
Like buckled and curled edges, tears in your vinyl flooring are a sign of wear. You may be able to fill these tears before installing new tile, but in many cases, removing the old vinyl flooring is preferable.
Old vinyl and linoleum floors can contain problematic materials like asbestos. If this is the case, you’ll likely want to have this material removed completely by professionals or leave it in place. You can’t score or sand vinyl or linoleum with asbestos for proper adherence of your new tile floor.
It’s important to note that certain types of resilient flooring make poor underlayment for any type of tile. These include perimeter-bond sheet vinyl, which may shift over time, and vinyl or linoleum with a cushioned structure that can become unstable.
Luxury vinyl planks shouldn’t be tiled over either since they are installed in a floating fashion without any type of adhesive. That means that the layer of luxury vinyl under your tile floors can shift over time, leading to potential cracks in your grout.
You’ve evaluated your existing flooring and it looks good without tears, cracks or buckled spots. It’s new enough that it doesn’t contain asbestos. It might seem counter-intuitive, but evaluating your subfloor is the next step.
For the best installation results, you want a subfloor that has minimal flexing and deflection. You’ll want to check for obvious signs of damage as well. These can be repaired to provide extra support.
Soft or thin subfloors will also need to be repaired or bolstered with additional plywood. If you skip this step you could find that your tile and grout joints crack over time once your new tile is in place.
Your existing flooring looks good and your subfloor seems plenty durable and capable of supporting the weight of porcelain, ceramic or natural stone tile. That means you’re ready to get to work, right? There is one more consideration to keep in mind.
How hard would it be to remove your existing vinyl flooring ? If the job looks relatively easy or you’re dealing with a small space like a powder room, there are a few reasons to consider removal before putting down tile.
One of the main reasons is that your floors may be too high once you install your tile flooring. While vinyl and linoleum tend to be very thin – almost always under 12mm – this can raise the overall level of your finished floors. Extra height may be a particular concern if you plan to use extra underlayment like plywood and backer board over your existing vinyl.
You may also need to repair certain parts of the floor by removing bulging or damaged spots before you begin. Even floors in good shape can have bulges or spots that need to be addressed before you can begin work. You may not notice these until you’re up close and personal with your existing vinyl or linoleum.
You’ve got vinyl or linoleum in tip-top shape, your subfloor is practically perfect and you’re not worried about the extra height that leaving it in place will give. You’re a prime candidate for placing tile directly over vinyl so you can get the new look you’re after.
Here are a few tips to help you through the process:
A floor sander is helpful for large spaces, but you can do this work with a power hand sander if you’re in a small area like a powder room.
Water and soap can take the first layer off, but you want to start with the best surface possible. Find a safe cleaning product to do a deep cleaning before you go further. TSP works particularly well for this job.
1/4″ thick cement boards are ideal for this installation since you don’t want the added height that 1/2″ boards would give you. A combination of plywood and cement backer board can also be used if you need to beef up your subfloor.
This is to make sure they fit before using any type of adhesive. Make sure you leave a 1/4-inch gap around walls and between boards.
Work quickly from the deepest point within your room.
You’ll use a drywall knife to cover the joints with thin-set adhesive.
4 hours is an ideal time frame, though you can do this work on a Friday and start your installation on Monday to be safe.


