How to Nail Down Hardwood Flooring
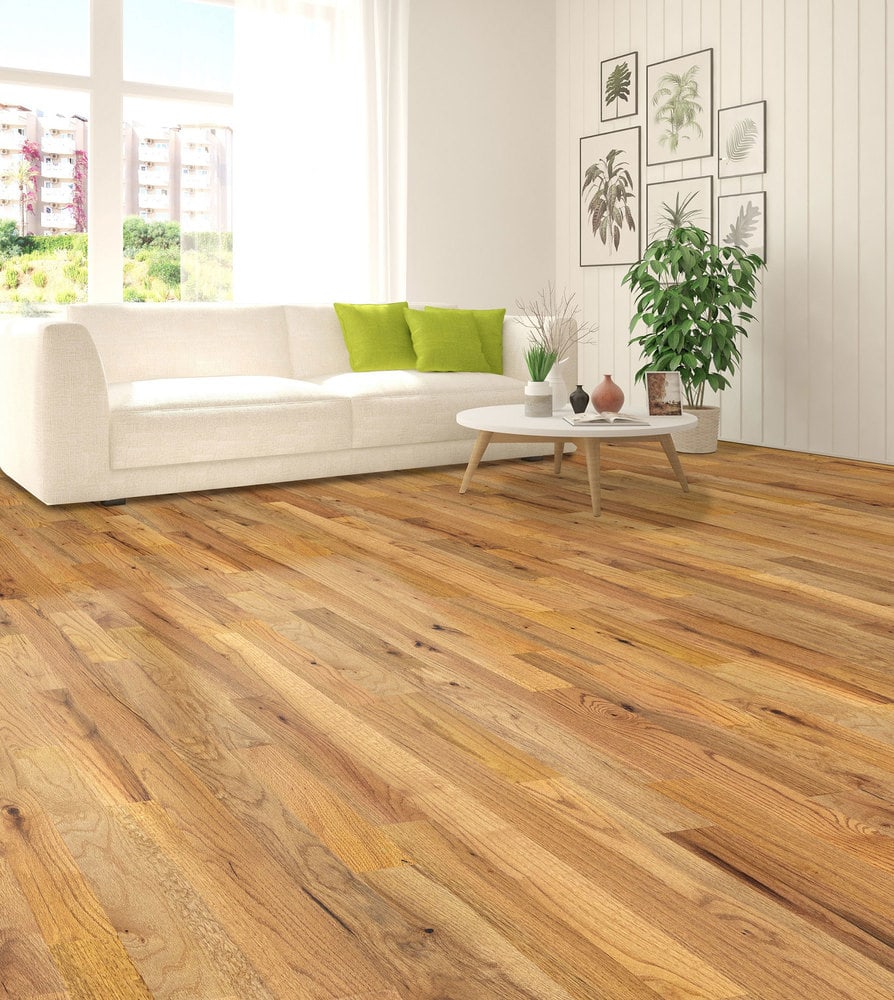
You might think that nailing down a floor would be straightforward, but there are actually a number of considerations before you even begin the project. Below, we have listed everything you need to know before you nail down hardwood flooring, and during the process.
Installer/Owner Responsibility
Hardwood flooring is a beautiful product of nature with inherent variations in appearance. But before you begin the installation, it’s important to note that it is the owner’s and installer’s responsibility to inspect and accept products. If a flooring board is not acceptable, do not install it and contact the seller immediately. Once a board has been nailed or glued down, it is deemed accepted by the installer and/or owner. Manufacturers generally deny any responsibility for judgment errors and/or for poor installation quality of their products.
Tools and Accessories Needed for Nail Down Hardwood Floor Installation:
- Power Miter saw
- Tenon-saw, circular saw or handsaw
- Claw hammer and nail punch
- Straight Edge
- Measuring Tape
- Moisture meter (wood, concrete or both)
- Chalk line and chalk
- Level and leveling compound
- #20 grit sandpaper
- Rubber Mallet and Tapping Block
- Pry Bar
- Filler stick and touch-up marker
- Utility knife
- Broom and dust pan
- Vacuum cleaner
- Ear plugs, safety glasses and dust mask
- Power nailer or stapler
- Electric drill and bits
- Hardwood flooring nails (nails or cleats)
- Finishing nails
- Flooring screws
- 15 lb Asphalt Paper
Temperature, Humidity, Storage and Handling
Hardwood is an organic material which reacts to changes of relative humidity. It absorbs or releases humidity according to seasons. To allow for proper acclimation, the heating/air-condition system must be operational for least 14 days prior to installation and thereafter at a temperature of 65°F – 75°F to reach desired humidity level. The relative humidity level at home should be controlled between 35% – 55% at all times prior, during and subsequent to installation.
In summer, when humidity is high, hardwood flooring absorbs the humidity in the air and expands. The expansion causes the strips/planks of wood to push against each other. This is referred to as “cupping“. These variations can be minimized with proper ventilation and dehumidifying. On the other hand, in winter, the relative humidity level at home is much lower due to the usage of heating system. The lower humidity level results the wood releases its humidity and the strips/planks contract or shrink. It is then recommended to use a humidifier to minimize extreme shrinkage effects.
Before you nail down hardwood, flooring must be stored in a controlled environment within the above mentioned temperature and humidity. In order to meet minimum installation requirements for moisture content, materials should be delivered 72 hours prior to installation or as long as necessary for the hardwood flooring to acclimate. Acclimation within a closed carton may not be adequate due to lack of air movement. Handle and unload with care, then store the flooring in a dry place and provide air space under cartons. Do not unload or transport flooring during wet conditions (i.e. rain, sleet or snow) because the wood will absorb moisture, which will cause it to swell. The swelling of the wood will cause installation problems, because eventually the wood will shrink back to its normal moisture content, and the resultant shrinkage may produce gaps in the finished flooring.
What to Complete Before Flooring Installation
The building must be completely closed in with all outside doors and windows in place. All “wet” work (such as concrete, masonry, framing members, drywall, paint, etc.) should be thoroughly dry. The wall coverings and painting should be completed before you nail down hardwood flooring.
In order to avoid damage caused by moisture, make sure basements and under-floor crawl space are dry and well ventilated. Plastering and concrete work must be completely dry with minimum of 90 days curing time. Freshly poured concrete slabs emit many gallons of moisture as water vapor, therefore no concrete should be poured after the flooring is installed.
Exterior grading should be complete with surface drainage offering a minimum drop of 3″ in 10′ to direct flow of water away from the structure. All gutters and downspouts should be in place.
Solid hardwood flooring only can be installed on or above ground level with a plywood subfloor. Engineered flooring can be installed above grade, at grade and below grade level. Do not install hardwood flooring in bathrooms. Always check with the manufacturer’s instructions to determine if your hardwood floor can be installed over an in-floor radiant heat system.
Crawl spaces must be a minimum of 24″ from the ground to underside of joists. A ground cover of 6-8 mil polyethylene sheeting is essential as a vapor barrier with joints lapped six inches and taped. The crawl space should have perimeter venting equal to a minimum of 1.5% of the crawl space square footage. These vents should be properly located to foster cross ventilation. Where necessary, local regulations must be met. Crawl spaces must be dry and well ventilated. Use a moisture meter to check the plywood (subfloor) moisture content. Delay the installation if the moisture content of the plywood (sub-floor) exceeds 12%.
Engineered hardwood flooring can be installed over a dry concrete subfloor. In order to test the moisture level of the concrete subfloor, tape 18″ x 18″ clear plastic sheeting to the floor in two spots, sealing all sides with moisture resistant tape. Leave in place for 48 hours and then remove. If after removing there is no condensation on the underside of the plastic sheeting, the concrete slab can be considered dry enough to install the engineered flooring. If there is moisture on the plastic sheeting, there is a problem and the flooring cannot be installed. A professionally installed moisture barrier would be required. Using the moisture meter, check the moisture content of the hardwood flooring to ensure that it is within the acceptable moisture range of 6% to 9%. The installer and/or owner has full responsibility for moisture testing the wood or concrete subfloor and the hardwood flooring prior to installation.
Subfloor Requirements
Subfloor preparation is a very critical step prior to the installation of your new floor. The hardwood floor is only as good as what is underneath it. Laminated rosin paper or construction paper acts as a moisture retarder and may be used to reduce movement caused by changes in subfloor moisture. Therefore it may reduce cupping and warping. It may also reduce sound transfer, and to prevent noise caused by minor irregularities and debris.
- Preferred ¾” CDX grade plywood with minimum of 5/8″ CDX grade plywood over joists subfloor
- Existing wood boards over joists subfloor and
- Dry Concrete subfloor (only for Engineered Floors and some thin profile solid wood floors)
Note: Particle board or other similar type products are not suitable subfloors.
Subflooring must be clean, smooth and free of wax, paint, oil, sealers, adhesives, curing agents and other debris. It must also be straight, flat and leveled. Sand high areas or joints, and flatten low spots with layers of builders felt, plywood or shims (not leveling compounds). It is important that subflooring must be structurally sound. Nail or screw any loose areas that squeak. Replace any damaged, swollen or delaminated subflooring. You also need to ensure that the subfloor is completely dry and meets moisture content requirements.
General Instructions Prior to Hardwood Floor Installation
- It is recommended that the flooring be installed at a 90 degree angle to the joists for wood subfloors. An additional 5% flooring must be added to the actual square footage needed when purchasing to allow for cutting and grading.
- Plan out the installation determining an appropriate color match of boards before you nail down hardwood flooring. The floor should be installed from several cartons at the same time to ensure a good color and shade mixture. Otherwise it can make the room look off.
- Remove any existing base molding, other moldings, door sills and old floor covering where applicable. Using a hand saw, undercut the bottom of door frames 3/4″ to slide hardwood board beneath.
- Do not use flooring pieces with obvious defects. As mentioned above, it is the installer’s/owner’s responsibility to ensure that the conditions of the flooring are acceptable prior to installation. Manufacturers typically decline any responsibility for flooring which is installed with obvious defects and/or flooring which is installed under improper jobsite conditions.
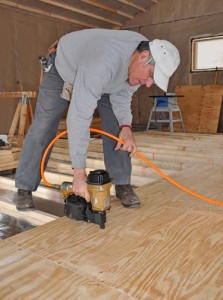
Nail Down Installation Guidelines
- Ensure that all the above subfloor conditions and general instructions have been met. Mark the locations of joists on perimeter walls so that the starting runs and finishing runs, which require face nailing, can be nailed into joists. Staple down 15 lb. asphalt paper or red rosin paper over the sub-floor, lapped 2″-4″ at seams. This helps prevent moisture from below, and helps prevent squeaks in dry seasons.
Note: some squeaking and crackling of the floor is normal when using the nail or staple down method, and is not considered a defect.
- Direction of the flooring should be installed at a 90 degree (right) angle to the floor joists. Expansion gaps of 3/4″ are required between flooring and all walls in room.
- Determine a starting wall. When possible, always begin the layout from the straightest wall, which usually tends to be an outside wall. Measure out from this wall at each end the width of one board (including the tongue) and then add an additional 3/4″ for expansion. At these measured locations, mark a chalk line parallel to the starting wall. The chalk line is the starting line for the placement of the first row of the floor.
- Face nail the first row. Install the first board along the chalk line, making sure that the tongue side of the board is facing away from the starting wall (i.e. tongue side is facing you). Drill holes through the face of the board at 6″ intervals, with the drill holes located approximately 1″ from the back edge. Secure the starter board to the subfloor with 1″ long finishing nails, by driving the nails until the heads are just above the board, then sink the nails with a nail set. Fill nailed areas with appropriate colored wood filler to match the flooring.
- Blind nail the board into place. Drill pilot holes along the tongue side of the board, using an appropriately sized drill bit for the nails. Set the bit in the corner formed by the tongue and edge of the board, angled at 45 degrees. Drill pilot holes approximately every 6″ through the board, and up to 2″ from each end. Do not drill within 2″ from each end. Drive a 1″ finishing nail into each pilot hole and sink the nail below the surface with a nail set.
- Install the remaining boards of the first row following all the instructions outlined in Steps 4 and 5. Ensure that the end tongues and grooves fit together snugly.
- For subsequent rows, ensure that the first board of each row is at least 6″ longer or shorter than that of the prior row to maintain a staggered appearance. Securely fit the groove of the new board into the tongue of the previous row. If necessary, use a rubber mallet and tapping block to achieve a snug fit. Blind nail the boards as described in Step 5. It is highly recommended that the first few rows be nailed by hand rather than with a power nailer or stapler because of the vertical wall obstruction. Once there is adequate space, subsequent rows may be installed using a power nailer or stapler, which eliminates the need for pilot holes. Follow all the manufacturer’s instructions when using the power nailer or stapler and continue to nail/staple the tongue side of each board at a 45 degree angle and at 8″ intervals, but do not nail/staple within 2″ from the end of each board. As you approach the end of each row, ensure that a long board is selected as the last board of the row, so that the cut portion of the last board can be used as the starting board of the next row to minimize waste.
- Due to the end wall proximity, installation of the last 4 to 5 rows will need to be done manually following the instructions for blind nailing outlined in Step 5. The end row may have to be rip-sawed to leave the required 3/4″ expansion gap along the end wall. The end row must be faced nailed in place, by drilling holes through the face of the board at 6″ intervals, with the drill holes located approximately 1″ from the back edge (i.e. 1″ from tongue side). Secure the end board with 1″ long finishing nails, by driving the nails until the heads are just above the board, then sink the nails with a nail set. Fill nailed areas with appropriate colored wood filler to match the flooring.
Complete the Installation
- Vacuum thoroughly and clean the floor with proper wood flooring cleaner on a soft, cloth mop. Then wipe the surface clean to remove loose dirt or soil.
- Reinstall all base and/or quarter round moldings. Nail the moldings into the wall, not the floor.
- Install any transition pieces that may be required, such as reducers, T-moldings and stair nosing.
- Keep several spare boards from the installation in the event of future repairs.
Note: This is a guideline only. Carefully read the manufacturer’s installation instructions that come with your product before beginning the installation process.

dave
I am looking to purchase some of your Mazama Jatoba in 3-3/4″ solid. Are staples and cleats equally acceptable or is one or the other preferred or required? And if yes, what is the reason? Thx
pat wichas
had real unfinished oak 4 in flooring installed.he had the wood sitting in our house for 2 weeks. the floor was sanded and then bleached and then stained with a white stain and then sealed. it looked good for awhile but soon after it started to get spaces. we live in a dry summer climate and it was summer when it went in and it started to separate right away. why???? i can stick my fingernail between the boards. this is not ok with me and i do not like the idea of him filling it because it will just come out and look bad help!!
BuildDirect Product Expert Team
Hi Pat,
Thank you for getting in touch, I’m sorry to hear about your floor! Unfortunately it sounds like it’s too dry in your home and the hardwood is contracting. The first thing to try is to get a humidifier and try to get the humidity levels between 35%-55%. Even if the humidity levels started at 55% and then lowered to 35% in a small amount of time you would get contraction because of the large change. It is very important to keep the humidity as consistent as possible. It would also help to get a small, wall-mounted humidity reader for the areas the flooring is installed so you can monitor the changes and ensure it stays consistent. I would also suggest getting an inspector out to take a look and make sure nothing else is going on with your floor. Hopefully this should bring the flooring back to it’s original condition! Please let us know if you have any other questions!
Rick
Is it acceptable practice to top nail a 2 1/4″ board in the case where a board is being replaced. The wood is 3/4″ oak unfinished.
Chris
Thanks. Good info.
I am in the process of nailing down my whole flooring. I was going to rent a flooring nailer from Home Depot but it was closed on Canada Day so I am just continuing nailing the whole floor down.
One problem I have though is the manufacturer on the box recomends to nail no closer than 3″ from the ends. And unfortunately I didn’t read further and read that the first board be nailed with nails 12″ apart and I took that for all of the boards. So all my boards in the living room (the long ones at least) have nails 12″ apart. Had I read further I would have seen to leave an 8″-10″ space between the nails. I don’t think it will be a problem but will I have problems down the road? The 3″ from the ends seems excessive and wouldn’t that cause more movement between the boards at a joint? Your article says 2″. The wood I am using is Red Oak and I’m predrilling all the holes at a 45 degree angle on the tongue. And I am using 2″ Ardox finishing nails.
So far the floor seems solid, but there is the odd pop and click as I walk on it. However shouldn’t that be expected in a wood floor?
There was one spot that creeked because the boards were slightly diferent widths. Luckily I was able find it and grab it with a couple of 1-1/4 drywall screws from the basement (squeek is now fixed).
Do you see any problems with my installation or should I have used a manual flooring nailer? A sledge hammer on the flooring nailer would have jammed the boards together better and made a tighter fit would it not?
So far my job looks great, I’ve been hammering them together with a block and making sure they are tight and I’m only off by about 1/16″ – 1/8″ from parallel across 14 feet of room where the length is about 24 feet. I am just going to continue through doorways and into the kitchen and hallway (it is a small house).
Do you have any tips for me or (too late now) tips for me? I realize it’s too late to add nails in the 12″ spaces ( I think that’s my biggest mistake). I could screw a few random screws in from the basement all over the place. What’s your suggestion on that? And only one place where I had two boards line up at the ends but that was in the closet and couldn’t be avoided also I didn’t want to have to measure and cut again to fit a piece under the door jam. So being in a closet area I didn’t think that’s much of a deal. Otherwise the floor is nicely randomized and space at least 6″ or more to any adjacent boards throughout the room. If I were to do it again, I’d probably rent a manual floor nailer.
I’m also screwing down any place on the subfloor that has any squeeks where I can find them to get rid of them before the flooring goes down. Some people think the flooring will take care of it but some advice, get rid of them before the flooring.
Any tips and added help would be much appreciated.
Phil Portera
Good information. When doing a whole house, how do you make sure that the boards will line up when neighboring roomss meet at the doorways? Thanks
Rob Woods
Hi Phil and thanks for the comment. It depends on whether you want to continue running the boards the same direction or change directions at the doorway. If you are changing directions I’d use a T-molding at the doorway to bridge the gap between the floors. If you are going to continue in the same direction I would actually start in one room and when you get the the next just keep going rather than do the two rooms separately and try to make the flooring meet in the middle somehow.